Easy Drawings For 14 Year Olds tiger is one of the world’s most dreadful and lethal predators. They are renowned as lethal apex predators and have stunning and unique coloring.
Tutorial for drawing tigers
Many people adore them due to their endearing appearance and bad image as dangerous animals. They can be seen in various artistic mediums, including paintings, movies, cartoons, etc.
Check out Easy Drawings For 14 Year Olds for simple, 8-step directions on how to draw a tiger if you want to learn how to do it yourself.
The sketching of the tiger has begun!
1:
- In this drawing tutorial, we’ll commence with the tiger’s skull. Start by drawing a few curved lines around the lions’ tiny, rounded ears.
- After the ears are in place, add the hair by drawing some angular, pointed lines on the back of the head.
2:
- Sketch the cranium.
- The following steps could be challenging, so pay careful attention to the reference image for guidance.
- I suggest using a light pencil to begin and a pen to complete these stages once satisfied with the final result.
- This stage will be completed by adding the tiger’s chin, open mouth, forehead, and inner ear line.
3:
- Keep in mind the tiger’s visage.
- You can begin drawing the tiger’s face after drawing its head. It will be beneficial to draw in each face component one at a time because this is another difficult process.
- To depict the tiger’s tiny, menacing-looking pupils, create curved lines with circles inside.
- The nose can then be rounded, and the lips may be very open. Your tiger must have pointed canines in its jaws once it is drawn.
- Again, I’d advise beginning this process with a pencil and ending it with a pen.
- I’m confident you’ll succeed if you take your time and pay close attention to the details.
4:
- Start pulling the torso in.
- You can create the torso of your tiger after drawing its head and face. The illustration shows that your tiger should have rounded shoulders and a comparatively upright back.
- Next, include a lovely, rounded chest with a few jagged corners to give it a furry appearance.
5:
- Now let’s add a tail and some appendages.
- Now that your tiger drawing is taking form, it needs legs. The front limb nearest to us will be relatively straight and have curved paws at the end.
- The rear limb can then be drawn with a rounded shape after the stomach has been added. The aThe final option is adding a straight tail that bends at the end.
6:
- Next, we’ll sketch the tiger’s rear legs.
- Given the legs you drew in the previous step, these upcoming legs ought to be a lot simpler.
- Add two legs identical to the other one you sketched but on the tiger’s other side to finish the other legs.
- When satisfied with its appearance, you can proceed to the last few stages because the reference image will help you understand how it should appear.
7:
- Give your tiger some stripes in the drawing’s seventh stage.
- You’re almost done with this tiger drawing tutorial! However, a tiger wouldn’t be without stripes, so we’ll add some for this stage.
- Examining the reference picture might seem difficult, but it isn’t as difficult as it might seem. You can give the tiger some stripes by drawing curved line patterns.
- But you can add stripes however you like; you’re not obliged to copy the illustration precisely. You can show off your creativity by redrawing the lines in this area however appropriate.
8:
- Finish it off by adding color.
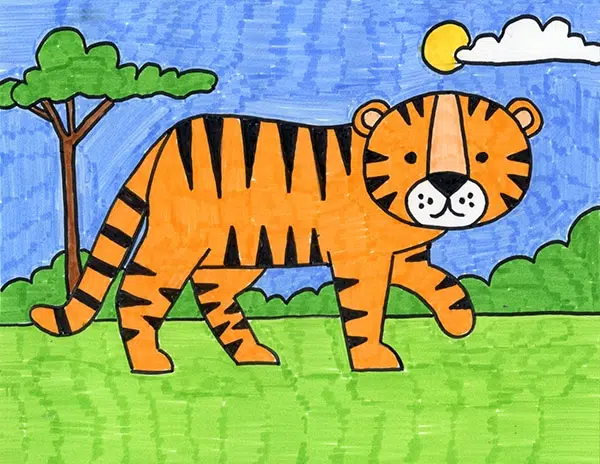
- Once you have completed drawing your entire tiger, you should be extremely pleased with yourself because there were a lot of details to get right on this one. Your incredible tiger drawing is completed but needs to be colored.
Use vibrant colors to let your creativity run wild for this stage. - Because vivid orange, black, and white are the traditional colors used to depict tigers, you can stay with them to produce a superior drawing result.
- That’s one way, but you could also get creative and use your preferred colors to create a more vibrant, artistic tiger!
- Acrylic paints would make the colors look vibrant and vivid if I made this tiger. I’d do that, but what hues and supplies will you use to paint your tiger?
Five Pointers To Improve Your Tiger Drawing!
- Use these entertaining suggestions to make your tiger drawing sparkle!
- In this drawing of a tiger, the animal appears to be roaring. You could illustrate this by giving the drawing a few extra details.
- These might be as easy to create as wavy lines emanating from the tiger’s mouth. Alternativelyly, you might draw a speech bubble by the animal’s mouth and writd “ROAR” in large letters.
- How do you suppose you could portray a powerful roar?
- Another way to improve this tiger drawing would be to surround it with other creatures. The tigers’ natural habitat could be used, but you could add any other animals you like!